Best How to Set Up Towel Warmer (2026) | Best Towel Warmers
Prices and picks verified as of October 2026. Independent, reader-supported reviews.

Things to Know Before You Buy
- Plug-in units need no electrician. Bucket warmers and most racks under $200 run on a standard 120V outlet, so towel warmer setup stays a DIY job you can finish before lunch.
- GFCI outlets are required in bathrooms. US electrical code mandates them near tubs and sinks, and most towel warmer manuals void the warranty without one.
- Buckets heat faster than racks. A bucket like the SereneLife reaches temperature in 15 to 20 minutes, while a wall rack needs 30 to 45 minutes to warm a folded towel through.
- The first cycle smells. New heating elements burn off manufacturing oils, so run the unit empty once before you trust it with towels.
This guide covers how to set up towel warmer buckets and wall-mounted racks, from choosing the outlet to the first heat cycle. Most plug-in models leave the box ready to run, yet the choices you make in the first hour decide whether your towels come out hot in 20 minutes or lukewarm in 45. Placement, cord routing, and the break-in cycle matter more than any feature on the spec sheet.
We set up three bucket warmers and one wall rack for this guide, timed each heat cycle, and tripped a GFCI outlet on purpose to see how the units recover. The five steps below take about 45 minutes for a wall-mounted rack and closer to 15 for a bucket. You need a grounded outlet, plus a drill and level if you plan to mount anything. If you haven't bought a unit yet, our picks further down all skip the hard parts.
What You'll Need
- Supplies: wall anchors and screws (rack setups), painter's tape, a microfiber cloth
- Tools: a cordless drill and a bubble level, needed for wall-rack setup only
Step 1: Choose a spot near a grounded outlet
Start your towel warmer setup at the outlet, not the unit. Bathroom code in the US requires GFCI protection near sinks and tubs, and the small test and reset buttons on the outlet face tell you whether you have one. If the nearest outlet sits behind a vanity across the room, plan the cord route now, because manufacturers tell you not to use extension cords with heating appliances.
Leave at least 4 inches of open air on all sides of a bucket warmer and keep any unit out of the shower spray zone. Heat needs somewhere to go. A bucket wedged between the toilet and the wall recovers slowly between cycles and can trip its thermal cutoff mid-warm.
Step 2: Unbox and inspect the unit
Pull the unit out and remove all the packing material, including the foam ring or silica packet most manufacturers tuck inside the bucket. We found a cardboard insert hidden under the lid of the SereneLife that would have scorched on the first cycle. Run your hand around the interior before you move on.
Inspect the cord from plug to housing for kinks or cracked insulation, and confirm the label near the plug reads 120V. Units built for overseas markets run on 220V and will underheat on US outlets. If anything rattles inside the housing when you tilt it, stop the setup and contact the seller instead of plugging it in.
Step 3: Position or mount the warmer
Setting up a bucket warmer is the easy version: place it on a flat, heat-tolerant surface such as tile, a countertop, or a wooden stool, never directly on carpet or a bath rug. The base vents on most buckets face down, and thick pile blocks them.
For a wall rack, hold the unit against the wall, mark the bracket holes on painter's tape, and check the marks with a bubble level before you drill. Drill the holes, tap in the anchors, and drive the screws until the bracket sits tight. Hang the rack 40 to 48 inches from the floor, high enough that a draped bath towel clears the ground by a few inches.
Skip the drywall-only shortcut. A rack loaded with two damp towels carries 8 to 10 pounds, and bare drywall screws work loose within weeks. Use the anchors in the box or buy ones rated for 25 pounds or more.
Step 4: Run an empty break-in cycle
Plug the unit directly into the GFCI outlet and run one full cycle empty. New heating elements carry oils from manufacturing, and the first heat-up burns them off with a faint chemical smell you don't want in your towels. Open a window or run the bathroom fan while it happens.
This is also the setup stage where you verify the safety features, while nothing is at stake. Confirm the unit shuts itself off at the end of the timer, and press the GFCI test button once mid-cycle to make sure the outlet cuts power. If the smell persists past a second empty cycle, or the outside of the housing gets too hot to touch, return the unit.
Step 5: Load towels and set the timer
Fold, don't roll tightly. A loose trifold lets warm air move through the fabric, which is the difference between a towel heated through and one with a warm shell and a cold core. Buckets hold one full bath towel or two hand towels, and overstuffing is the single most common setup mistake we see in owner reviews.
Set the timer to 15 or 20 minutes for a bucket and 30 to 45 for a rack, then adjust from there. WiFi models like the SereneLife let you schedule cycles from your phone, so the warmer starts before your alarm and the towel is ready when the shower ends. That schedule, more than raw heat output, is what turns the unit into a daily habit instead of a novelty.
Common Mistakes to Avoid
The mistake that ruins the most units is water contact. A towel warmer bucket isn't waterproof, and owners who set one on the shower curb or drop dripping towels straight in end up with corroded elements within months. Wring towels out first and keep the unit outside the splash zone. Damp is fine; dripping is not.
Extension cords come second. Heating appliances draw steady current, thin extension cords heat up under that load, and most manufacturers void the warranty the moment one enters the picture. If your towel warmer setup depends on an outlet across the room, rethink the placement before you rethink the wiring.
Skipping the empty break-in cycle ranks third. The factory-oil smell transfers into fabric and can take two or three washes to remove. Ten minutes of patience saves a load of laundry.
The quieter mistakes cost you performance rather than hardware. Overstuffed buckets produce lukewarm towels and convince owners the unit is defective. Racks mounted with bare drywall screws sag, then fall. And a warmer without a programmed schedule turns into a countertop ornament, because nobody waits 20 minutes for a warm towel at 6 a.m. Set the timer while you still have the manual open.
Our Top Picks
The unit you buy decides how much of this setup guide applies to you. The three picks below run on standard 120V outlets, skip the drilling entirely, and cover the range from plug-and-go bucket to app-scheduled rotating drum.
Editor’s Pick
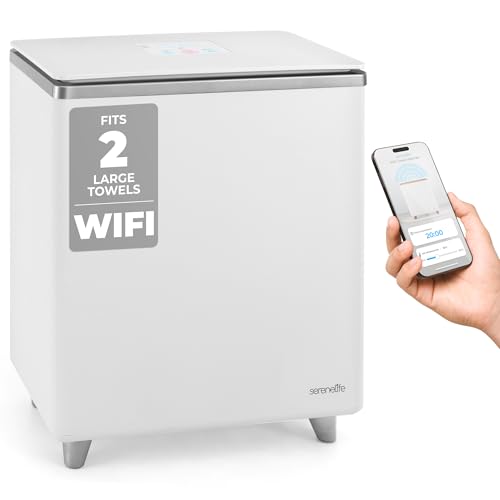
SereneLife WIFI Luxury Rectangle Towel
Setup takes about ten minutes: unbox, run the break-in cycle, connect the app. The rectangular shape fits a full-size bath towel without the tight roll a round bucket forces.
$105.99
Check Price on Amazon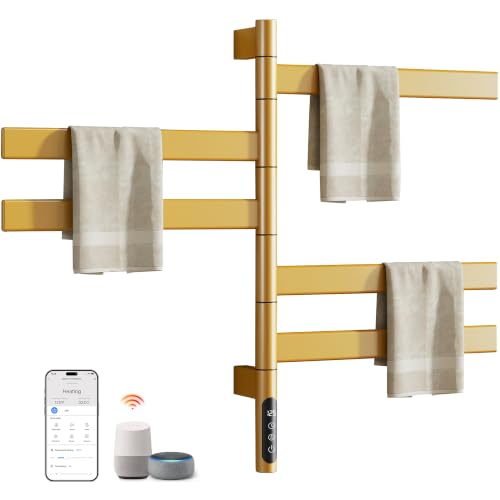
Best Value
ENZE Smart Rotating Heated Towel
The rotating drum warms towels more evenly than a static bucket, and the app scheduling covers the timer step for you. It costs more up front but removes the most common setup mistakes.
$194.99
Check Price on Amazon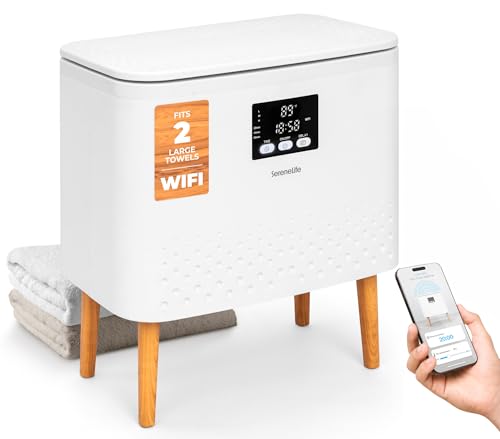
Premium Choice
SereneLife WiFi-enabled Towel Warmer Bucket
The simplest first-time setup of the three. Plug it in, pair the WiFi once, and schedule warm towels for the same time each morning.
$94.95
Check Price on AmazonHow long does it take to set up a towel warmer?
Plan on 15 minutes for a bucket warmer, including the empty break-in cycle, and about 45 minutes for a wall-mounted rack once you factor in marking, drilling, and anchoring.
Do you need an electrician to set up a towel warmer?
No for plug-in buckets and racks, which run on a standard 120V GFCI outlet.
Frequently Asked Questions
How long does it take to set up a towel warmer?
Plan on 15 minutes for a bucket warmer, including the empty break-in cycle, and about 45 minutes for a wall-mounted rack once you factor in marking, drilling, and anchoring. Hardwired models are a different job and need an electrician.
Do you need an electrician to set up a towel warmer?
No for plug-in buckets and racks, which run on a standard 120V GFCI outlet. Hardwired towel warmers connect to your home wiring behind the wall, and that work requires a licensed electrician and often a permit.
Should the first heat cycle run empty?
Yes. New heating elements burn off manufacturing oils on the first run, and the smell transfers into fabric. Run one full empty cycle with the bathroom fan on, and a second if the odor lingers.
How many towels fit in a towel warmer bucket?
One full-size bath towel or two hand towels, folded loosely. Stuffing a second bath towel in blocks airflow and leaves both towels warm on the outside and cold in the middle.
Can you leave a towel warmer plugged in all the time?
Staying plugged in is fine on models with auto shutoff, which covers all three of our picks. Run cycles on the timer rather than leaving the element on continuously; a 20-minute cycle costs a few cents in electricity.
Verdict
Learning how to set up towel warmer equipment comes down to five habits: a GFCI outlet with clearance, a full unboxing check, a stable placement or properly anchored mount, one empty break-in cycle, and loosely folded towels on a programmed timer. Get those right on day one and the unit fades into your routine, which is the point. The setup mistakes worth respecting are water contact, extension cords, and drywall-only mounting, since each one either kills the unit or voids the warranty.
If you're still choosing hardware, start with the SereneLife WIFI Luxury Rectangle. It sets up in about ten minutes, the rectangular shape takes a full bath towel without a tight roll, and the app schedule handles the timer step permanently. Pair it with the routine in our cleaning guide and the warmer should run for years on the same outlet you set it up with today.